At Trafalgar, the most dangerous part of Nelson’s plan came before his ships could properly fight back. They had to sail towards an enemy line with their bows exposed, while most of their own guns pointed out to the sides.
It was a calculated risk, taken in light winds off the coast of Spain on 21 October 1805. The reward was the chance to turn a battle between two fleets into a series of close encounters that British crews were well prepared to win. The cost was paid by the men in the leading ships, including Nelson himself.
The Battle of Trafalgar is often reduced to a famous signal, two columns of ships and an admiral’s death. Its fuller history is more revealing: a campaign fought over enormous distances, a plan that depended on independent judgement, and a victory followed almost immediately by a struggle against the sea.
Trafalgar At A Glance
- When: 21 October 1805.
- Where: off Cape Trafalgar, south-west Spain.
- Opponents: the Royal Navy against a combined French and Spanish fleet.
- Ships Of The Line: 27 British against 33 allied ships.
- Result: British victory; 17 enemy ships captured and one destroyed during the action. Many prizes were subsequently lost.
Figures refer to ships of the line, the principal fleet warships, rather than every supporting vessel present. Source: Royal Navy Museums.
Why Were The Fleets Fighting Off Spain?
The obvious place to look for a battle connected with an invasion of Britain is the English Channel. Trafalgar happened far to the south because the naval campaign had become a long contest of pursuit, evasion and blockade.
Napoleon needed temporary control of the Channel to protect an army crossing it. In 1805, French and Spanish naval movements drew British ships across the Atlantic to the West Indies and back. The combined fleet eventually entered Cádiz, where British forces watched it. By the time it sailed again in October, Napoleon’s attention had shifted towards continental war; the fleet was ordered towards the Mediterranean. Trafalgar was therefore not a fight against an invasion armada already approaching an English beach. The National Museum of the Royal Navy’s account sets out this changing strategic background.
Sea power involved more than winning spectacular battles. Warships protected trade, watched enemy ports, carried messages and supported allies. Long periods at sea were exhausting, but they also gave crews repeated practice in handling ships. Naval historian Joseph F. Callo connects that operational experience with the Royal Navy’s confidence in 1805. The battle would test skills accumulated well before the first cannon fired.
How Did Nelson’s Tactics Work?
A sailing warship concentrated its heaviest weapons along its sides. A line of ships following one another allowed each vessel to fire a broadside without a friendly ship blocking its guns. The formation made practical sense: it combined firepower with a recognisable order.
Nelson wanted to disrupt that order. His fleet approached in two divisions. He led one in Victory; Vice-Admiral Cuthbert Collingwood led the other in Royal Sovereign. Collingwood attacked towards the rear of the allied formation, while Nelson struck nearer its centre. Once the British ships passed through, they could turn and engage at close range. The ships ahead of the breaks could not instantly stop, turn and return to help. Wind, sail and distance imposed delays that a modern reader can easily underestimate. Royal Museums Greenwich’s account of the opening action explains the two points of attack.
That approach exposed the leading British ships to fire before they could use their full broadsides. The plan exchanged an immediate danger for a later advantage. Calling it simply “breaking the line” misses the essential question: what could the attackers do once they were through?
A Plan That Allowed For Confusion
Nelson did not invent every element of line-breaking. His distinction lay partly in explaining his intentions and trusting others to act on them. His memorandum left Collingwood considerable freedom and anticipated that signals might become unreadable. In smoke and damaged rigging, an instruction understood beforehand could be more useful than a new flag hoist. Callo’s analysis of the memorandum makes this point particularly clearly.
A surviving sketch associated with Nelson’s 1805 planning also warns against treating a neat modern diagram as the battle itself. Greenwich describes a proposed arrangement involving three divisions. Plans developed; the action unfolded under its own pressures. The familiar two arrows on a map are an explanation, not a complete reconstruction.

What Was Happening Inside The Ships?
From a distance, a ship of the line appears to be one weapon. Inside, it was a crowded workplace. Sails, steering, ammunition and guns all depended on people carrying out different tasks at the same time.
Victory carried 104 guns at Trafalgar. The museum’s conservation record notes that the lower gun deck was also a living space: men ate and slept on the same deck where they fought. It records the enormous weight of the guns distributed between decks and the practical experiments involved in arranging them, handling ammunition and protecting powder. The power of the ship depended on managing that weight and movement safely as much as on possessing cannon.
The distinction between sailor and fighting man was not absolute. Of the 147 Royal Marines aboard Victory, only 40 were initially stationed on the upper deck; the remainder were distributed among the gun crews. Marines also guarded important areas, used muskets and resisted boarding. These details, preserved in the museum’s account of Captain Charles William Adair, give a more precise picture than the idea of two crews simply firing from opposite rails.
Adair was killed. Lewis Roteley, a Marine officer aged only 20, found himself taking command of the detachment on deck after other officers were killed or wounded. Such abrupt changes in responsibility were part of the battle’s reality. A fleet plan might begin with admirals; its survival depended on people much further down the chain of command.
How Did Nelson Die At Trafalgar?
Nelson was mortally wounded by a musket shot while Victory was fighting the French Redoutable. Carried below, he died later that afternoon. The battle continued around him.
His surviving uniform makes the event unusually tangible. The coat held at Greenwich has a bullet hole in the left shoulder. Blood on other parts of it is thought to have come from his secretary, John Scott, who had been killed earlier. The object records more than one casualty. It brings the famous death back into a deck crowded with other people’s injuries and losses.
The documentary record widens that view. Surgeon William Beatty’s return, discussed by The National Archives, follows wounded men beyond the battle: some recovered aboard, others needed treatment at Gibraltar or on a hospital ship. The ending of the gunfire was not the ending of their experience.
Why The Storm After Trafalgar Matters
A captured ship was called a prize, but taking possession was only the beginning. A damaged vessel still had to be kept afloat and brought to safety. With masts down, exhausted crews and wounded men aboard, a change in weather could undo the apparent certainty of victory.
By the evening of 22 October, a full gale was blowing. The Greenwich account of the aftermath records the loss of captured vessels during the storm and notes that only four enemy ships ultimately remained in British hands. Others were wrecked, escaped or were disposed of during the crisis. “Seventeen ships captured” describes the result of the fighting, not seventeen intact additions safely delivered to British ports.

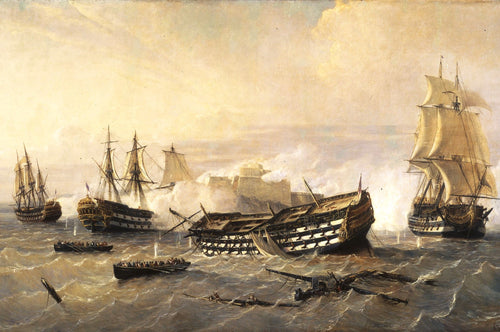
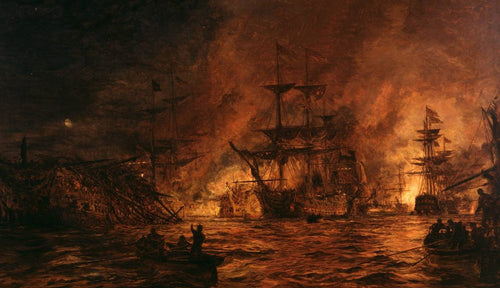
Beechey’s painting is a useful place to pause. The great hull tilts towards the viewer, while small boats carry people through the foreground. The scale of the warship no longer promises safety. Read as an artistic interpretation, the composition asks us to look at the work of rescue rather than count captured flags.
Can We Trust Paintings Of Trafalgar?
Maritime paintings help us imagine a world that photographs could not record. They also need to be questioned. When was the picture made? Was the artist present? Does it show one moment, or combine several? A convincing sea and carefully drawn rigging do not automatically make a painting an eyewitness account.

Turner’s large Battle Of Trafalgar was commissioned by George IV in 1822 and unveiled in 1824. It provoked criticism because events from different stages of the action appeared together. Royal Museums Greenwich’s study of the painting explains that its purpose was broader than a literal record of ship positions.
Look at the contrast between the immense ship and the exposed figures below it. Victory dominates the composition, yet the eye repeatedly returns to people close to the water. The image can celebrate naval power while making its human cost impossible to ignore. That tension is why it rewards more than a quick glance.
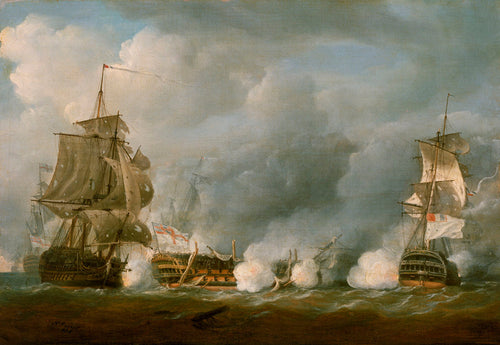
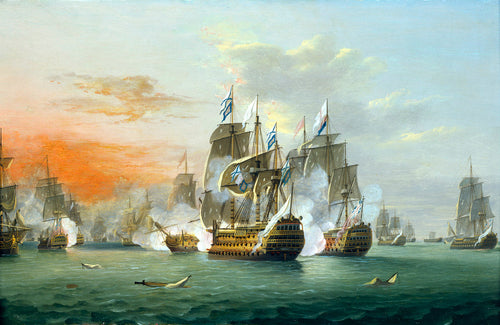
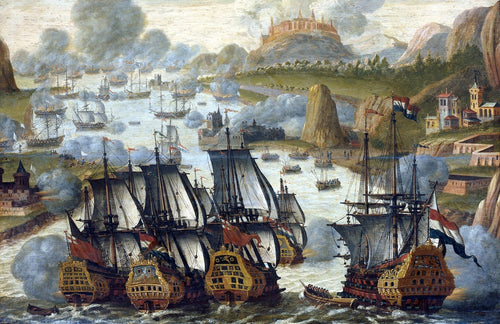
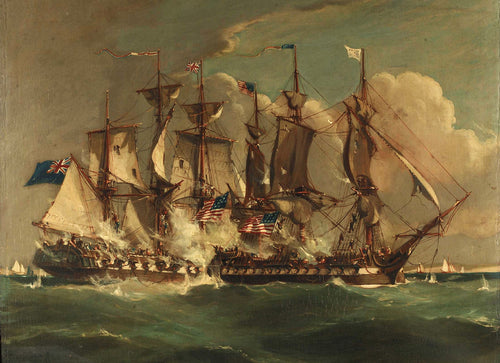
Compare it with Buttersworth’s view and Beechey’s aftermath. Each gives a different emphasis: the encounter between ships, the drama of a national victory, and the vulnerability that followed. None should replace the written record. Together with it, they show how the battle became a subject of memory as well as history.
Why Was Trafalgar Important?
No British ship was lost in the battle, and the combined fleet suffered a decisive defeat. Yet the wider war continued for almost another decade. The distinction matters: winning command of the sea could constrain an enemy without defeating his armies on land. Greenwich’s summary of the action places Trafalgar within that longer war.
Its enduring interest lies in the connection between planning and uncertainty. Nelson accepted danger at the point of approach, relied on experienced crews and gave his commanders room to make decisions. The storm then exposed the limit of any commander’s control. Victory was real, but it did not make the sea obedient.
That is a more useful way to remember Trafalgar than as an inevitable triumph. It was an operation carried through by thousands of people, followed by rescue, loss and difficult decisions. The paintings preserve its spectacle. The records help us see the labour and suffering beneath it.
Questions About The Battle Of Trafalgar
Did Nelson Survive The Battle?
No. He was mortally wounded aboard Victory and died on 21 October 1805.
Was Trafalgar The End Of The Napoleonic Wars?
No. It was a decisive naval victory in 1805; the wars continued until 1815.
Why Did The British Attack In Two Columns?
The aim was to break up the opposing formation and concentrate the fighting against part of it, accepting heavy fire during the approach in exchange for an advantage at close quarters.
Are The Illustrations Original Paintings For Sale?
The illustrations reproduce historical paintings. The caption links lead to fine art reproduction prints in the Historical Maritime shop.
Sources And Further Reading
The historical account draws on the museum, archive and naval-history sources linked throughout. Artwork titles and shop links were checked against the Historical Maritime catalogue. Interpretations of composition are our own; the paintings are not presented as photographic evidence.
- Royal Navy Museums: The Battle Of Trafalgar
- Joseph F. Callo: Lasting Lessons Of Trafalgar, Naval History (2005)
- Royal Museums Greenwich: Beginning Of The Action and End Of The Action
- Nelson’s Planning Sketch
- HMS Victory Conservation Record and The Royal Marines At Trafalgar
- Nelson’s Trafalgar Coat
- The National Archives: Victory’s Killed And Wounded
- Turner’s Battle Of Trafalgar: A Maligned Masterpiece?
Explore more maritime history articles or browse the fine art print collection.